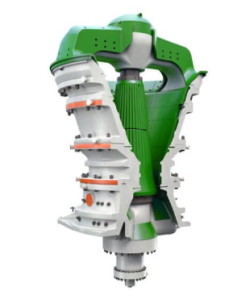
Rising oil temperature, unstable discharge size, bronze particles in the lubrication system, abnormal vibration, and uneven liner wear are early warnings that Raptor XL900 crusher parts need inspection. These symptoms usually appear before a complete shutdown. If the crusher continues running under full load without checking the worn components, the damage can move from replaceable wear parts to the head, mainshaft, socket, eccentric assembly, gear, or frame seating area. Raptor XL900 cone crushers are used in heavy-duty mining, quarrying, and aggregate production sites where the crusher works under high crushing force, abrasive feed material, and repeated impact load. In this operating environment, maintenance should not only focus on replacing the mantle and bowl liner. Bronze bushings, socket liners, countershaft parts, gear contact surfaces, sealing components, and lubrication passages must also be inspected during shutdown.
This maintenance guide explains the key Raptor XL900 crusher parts that require regular inspection, the common failure signs before shutdown, and the spare parts planning method that helps reduce emergency repair cost.
Main Raptor XL900 Crusher Parts Covered in Maintenance
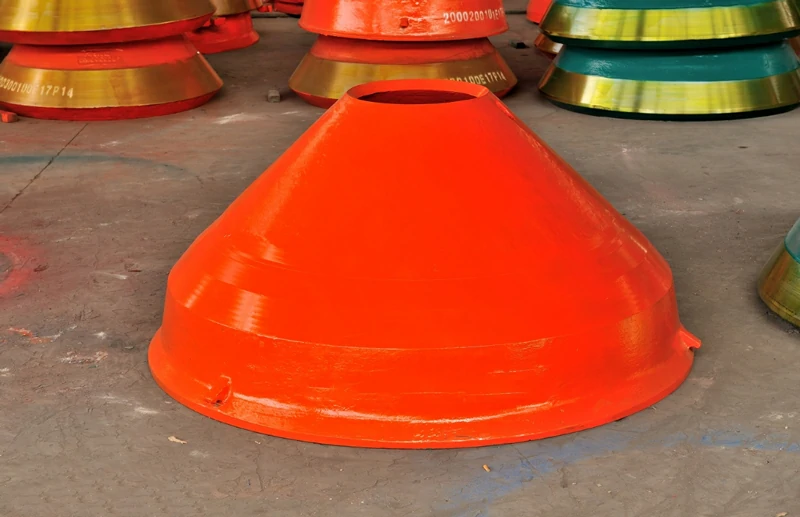
Mantle and Bowl Liner
The mantle and bowl liner are the main wear parts in the crushing chamber. They directly affect crushing cavity shape, feed opening condition, discharge size, capacity, and liner utilization. Uneven wear on these parts can cause poor product shape, unstable closed side setting, reduced throughput, and higher power consumption.During inspection, maintenance teams should check the wear profile instead of only checking the remaining weight. A liner may still have metal thickness left, but the chamber shape may already be unsuitable for stable crushing. Common signs include local deep grooves, uneven wear bands, cracking, loose seating, abnormal product size, and a sudden drop in capacity.If the crusher is not choke-fed, or if the feed is segregated to one side of the chamber, the mantle and bowl liner can wear unevenly. This does not only shorten liner life. It can also increase vibration and transfer abnormal load to the head, socket liner, and eccentric assembly. For this reason, liner inspection should always be connected with feed condition, CSS record, motor power trend, and product size analysis.
Eccentric Bushing and Head Bushing
The eccentric bushing and head bushing are critical bronze parts in the Raptor XL900 crusher. These components support the gyrating movement of the head and help maintain stable clearance between moving and fixed structures. If the bushing surface is damaged, the crusher may show rising oil temperature, bronze powder in the lubrication oil, abnormal noise, or unstable head movement.Inspection should include bore wear, surface scoring, oil groove condition, roundness, concentricity, and contact pattern. Long scratches on the bronze surface often indicate hard particle contamination. Dark heat marks may indicate lubrication failure or excessive friction. Edge loading may indicate misalignment, incorrect clearance, or damaged mating surfaces.Replacing a bronze bushing without checking the shaft or housing surface can lead to early failure of the new part. Before installing a new eccentric bushing or head bushing, the maintenance team should check the mating steel surface, lubrication holes, oil groove alignment, and installation fit. The replacement part should be verified by drawing, part number, or measured sample, not only by product name.
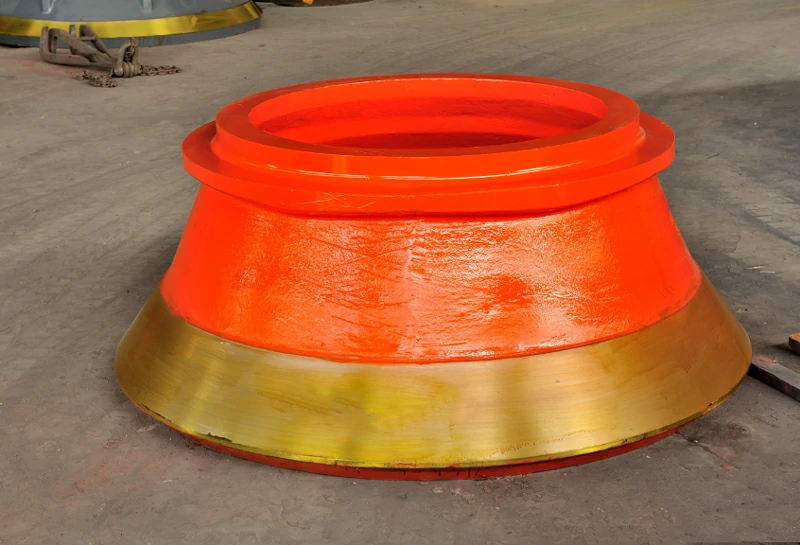
Socket Liner and Socket
The socket liner supports sliding contact in the lower head area. It carries heavy load while allowing controlled movement. If the socket liner wears unevenly, the head may lose stable support, causing vibration, localized heat, poor contact, and increased stress on nearby components.During shutdown, inspect the socket liner for scoring, pitting, uneven contact bands, cracks, and metal transfer. The socket surface should also be checked. If the socket liner is replaced but the socket surface remains damaged, the new liner may not seat correctly. This can shorten service life and cause repeated maintenance problems.Lubrication is also important in this area. Blocked oil passages, incorrect lubricant viscosity, or contaminated oil can cause direct metal contact. After replacement, the lubrication system should be checked before the crusher returns to full production load.
Countershaft, Gear, and Pinion Area
The countershaft area transfers power into the crusher. Problems in this area often show as abnormal noise, vibration, gear tooth wear, oil contamination, heat, or reduced drive stability. Key components include the countershaft, countershaft bushing, countershaft housing, gear, pinion, seals, and related bearings.
Inspection should focus on gear tooth contact pattern, backlash, pitting, scoring, bearing condition, bushing wear, seal condition, and housing alignment. If gear contact is incorrect, the crusher may continue running but the gear teeth can wear quickly under load. If the countershaft bushing is worn, shaft movement can affect gear mesh and cause secondary damage.
During repair, replacing only the gear or pinion is not enough if the countershaft housing, bushing, or bearing condition is ignored. The drive system should be checked as an assembly. This helps prevent repeated failure after restart.
Mainframe Seat Liner and Frame Contact Area
Mainframe seat liners and contact surfaces support upper crusher structures and help maintain stable positioning. Wear, deformation, or contamination in the seating area can affect crusher adjustment, liner seating, and load distribution.
Inspection should include surface flatness, local dents, cracks, wear depth, loose contact, and foreign material between mating surfaces. If the seating area is not clean or is already damaged, new parts may not fit correctly. This can create uneven load and increase the risk of movement during operation.
Common Failure Signs Before Raptor XL900 Crusher Shutdown
Oil Temperature Rises Under the Same Load
If oil temperature increases while feed condition and production load remain similar, the lubrication system and bronze parts should be checked. Possible causes include abnormal bushing clearance, blocked oil grooves, oil contamination, wrong oil viscosity, poor oil flow, or scoring on the bearing surface.
High oil temperature should not be treated as a normal production variation. It is often an early warning of friction increase. If the cause is ignored, the bronze surface may overheat, and the mating steel component may also be damaged.
Uneven Liner Wear
Uneven liner wear often comes from poor feed distribution, incorrect liner profile, unstable CSS, non-choke feeding, or mismatch between mantle and bowl liner. It can also indicate that the crusher is not operating in the intended crushing chamber condition.
Maintenance teams should record liner wear patterns with photos before disassembly. The wear pattern can show whether the feed is entering the chamber correctly. It can also help decide whether the same liner profile should be used again or whether a different chamber design is needed.
Bronze Particles in Oil or Grease
Bronze particles in oil or grease usually indicate wear from bushings, socket liners, or other bronze sliding parts. A small amount of fine material may appear during running-in, but visible or increasing bronze contamination should be investigated.
Possible causes include lubrication failure, hard particle contamination, incorrect clearance, surface scoring, oil starvation, or damaged mating parts. Continuing operation without inspection can turn a bushing replacement into a major repair involving the head, eccentric, socket, or mainshaft.
Abnormal Vibration or Noise
Abnormal vibration can come from liner seating problems, head bushing wear, socket liner damage, countershaft bearing wear, gear backlash issues, or loose structural contact. Noise from the drive area may indicate gear or pinion problems. Noise from the head or lower assembly may indicate bushing, socket, or lubrication issues.
Vibration data should be compared with previous operating records. A sudden change is more important than one isolated reading. If vibration increases after liner replacement or after a major repair, the crusher should be inspected before returning to full load.
Raptor XL900 Crusher Parts Inspection Checklist
Daily Inspection
Daily checks should include oil temperature, oil pressure, lubrication flow, crusher sound, vibration trend, discharge size, hydraulic pressure, and visible leakage. Operators should also observe whether the crusher is choke-fed and whether feed distribution is centered.
These checks help detect early changes before the crusher reaches a failure condition. A daily record is useful because many crusher problems develop gradually.
Weekly Inspection
Weekly inspection should include oil sample condition, filter condition, grease contamination, CSS adjustment record, liner wear pattern, seal condition, and drive system condition. If the plant has vibration monitoring, weekly trend review should be included.
The goal is to find abnormal trends. For example, if oil temperature increases slightly every week, or if oil filters show more metal particles than usual, the maintenance team should plan further inspection before the next major shutdown.
Shutdown Inspection
During planned shutdown, inspect the mantle, bowl liner, torch ring, feed plate, socket liner, eccentric bushing, head bushing, countershaft parts, mainframe seat liner, seals, bolts, and locking system. Critical dimensions and contact surfaces should be measured or photographed.
Shutdown inspection is the best time to identify root causes. If a liner is worn unevenly, check feed condition and seating surfaces. If a bronze bushing is scored, check oil cleanliness and mating surfaces. If the gear is damaged, check countershaft alignment and bearing condition.
Maintenance Procedure for Raptor XL900 Wear Parts
Before Disassembly
Before disassembly, the crusher should be locked out according to site safety procedures. The chamber should be cleaned, and the maintenance team should record CSS, oil temperature, oil pressure, vibration data, and liner wear condition. Photos should be taken before parts are removed.
Replacement parts, lifting tools, seals, fasteners, measuring tools, and inspection documents should be prepared before shutdown. Missing small parts can delay restart even when the major components are ready.
During Disassembly
During disassembly, removed parts should be inspected before being discarded. The wear pattern on the mantle, bowl liner, socket liner, and bushings can help identify operating problems. Seating surfaces should be checked for cracks, dents, metal transfer, or contamination.
Machined surfaces should not be damaged during handling. Heavy crusher parts require correct lifting methods. If a component is dropped, dragged, or hit against another part, installation accuracy may be affected.
Before Installing New Parts
Before installation, compare the new parts with the removed parts. Verify part number, model compatibility, material, key dimensions, oil grooves, holes, chamfers, and seating surfaces. For bronze parts, check that oil grooves and lubrication holes match the original design.
All seating surfaces should be cleaned. Old oil, grease, dust, broken liner material, and metal particles must be removed. Installing new parts on dirty or damaged surfaces can cause poor seating and early wear.
After Installation
After installation, confirm that the lubrication system is ready before starting the crusher. Run the machine under no-load or light-load conditions first, then monitor oil temperature, oil pressure, vibration, and sound. CSS and product size should be checked after commissioning.
Do not return the crusher to full load immediately after major repair if abnormal temperature, noise, or vibration appears during initial operation. Early correction is cheaper than emergency shutdown after the crusher is fully loaded.
How to Decide Replacement Timing
Do Not Use Weight Loss Alone
Wear part replacement should not be decided only by remaining weight. The crushing chamber profile may be worn out before the liner reaches its lowest possible weight. A worn profile can reduce capacity, increase power consumption, and create unstable product size.
Use liner thickness, wear pattern, product size, power draw, CSS stability, and chamber condition together. This gives a more accurate replacement decision than weight alone.
Use Wear Pattern Instead of Calendar Days Only
Different sites have different wear rates. Ore hardness, abrasiveness, moisture, feed size, feed distribution, and operating hours all affect part life. A fixed calendar interval may be too early for one site and too late for another.
The better method is to build a wear history for each crusher. Record installation date, operating hours, feed condition, liner profile, CSS, production rate, and removal condition. After several cycles, the site can create a practical replacement schedule.
Replace Before Secondary Damage
Bronze bushings, socket liners, and wear liners are designed to be replaceable. Mainshafts, heads, sockets, gears, and frames are much more expensive to repair or replace. If a wear part is already damaging a mating component, the crusher should not continue running only to gain a few more production days.
The lowest-cost maintenance plan is usually not the plan that uses every part until failure. It is the plan that replaces parts before secondary damage begins.
Raptor XL900 Crusher Parts Selection Guide
Match the Crusher Model and Part Information
Raptor XL900 crusher parts should be selected according to crusher model, part number, serial information, technical drawing, old sample, and installation position. Ordering only by name can cause mistakes because similar parts may have different dimensions, profiles, or material requirements.
For critical components, the supplier should confirm the drawing, material, machining tolerance, and inspection requirement before production.
Check Material and Heat Treatment
Different crusher parts require different material control. Mantle and bowl liner materials must be selected according to feed abrasiveness and crushing conditions. Bronze bushings require chemical composition, hardness, casting quality, and machining accuracy control. Steel parts require strength, dimensional accuracy, heat treatment, surface condition, and sometimes non-destructive testing.
Using the wrong material may not fail during installation, but it can fail early during operation. The material must match the load, friction condition, impact level, and working temperature of the part.
Do Not Ignore Machining Accuracy
Machining accuracy affects installation and service life. For bushings, ID, OD, roundness, concentricity, oil groove position, and surface finish are important. For gears and pinions, tooth contact, backlash, and surface finish must be checked. For seating components, flatness and contact area affect load distribution.
A part with correct material but poor machining can still cause vibration, heat, installation difficulty, or early wear.
Common Maintenance Mistakes on Raptor XL900 Crushers
One common mistake is replacing the mantle and bowl liner without checking feed distribution. If poor feed distribution caused the wear problem, the new liners may wear the same way.
Another mistake is installing bronze bushings without inspecting the shaft, housing, or lubrication passages. A new bushing cannot perform correctly if the mating surface is damaged or if the oil groove is blocked.
Some maintenance teams reuse damaged torch rings, ignore seal wear, or fail to clean oil channels before assembly. These small decisions can create large repair costs later. Another common problem is running the crusher at full load immediately after major repair. Commissioning should include temperature, vibration, lubrication, and sound monitoring before normal production resumes.
Recommended Spare Parts List for Raptor XL900 Maintenance
For planned maintenance, sites should consider stocking or preparing the following Raptor XL900 crusher parts according to shutdown schedule and operating history:
- Mantle
- Bowl liner
- Torch ring
- Feed plate
- Socket liner
- Socket
- Eccentric bushing
- Head bushing
- Mainshaft
- Head
- Bowl
- Gear
- Pinion
- Countershaft
- Countershaft bushing
- Countershaft housing
- Mainframe seat liner
- Seal kit
- Hydraulic cylinder parts
- Lubrication system components
The spare parts list should be adjusted according to the site’s wear history. A mine processing abrasive ore may need more frequent liner and bushing preparation. A quarry with stable feed may focus more on planned liner changes and lubrication system parts.